
No articles found for “”.
How employees complete their own onboarding
Instead of HR keying in every employee's tax, bank, and pension details, you can invite each employee to fill in their own from the portal. They submit; you review and approve.
The 5-step portal form
After signing in, the employee sees an onboarding wizard with these steps:
- Personal details, full name, date of birth, phone, address.
- Tax and pension, NIN, TIN, PFA name and PFA code, RSA PIN, and whether they choose to contribute to NHF (unticked unless your company is set as public sector).
- Bank details, bank, account number. SpireSlip checks the account name through your company's payment connection. If the company has none, the name cannot be checked there; the employee can still save the account.
- Employment review, role, start date, gross salary. These are read-only and pre-filled from the HR record.
- Submit, the employee confirms everything is correct and submits for HR review.
The HR verification queue
Submissions land in the onboarding queue: on the Employees page, click Verification queue. You see who submitted, when, and a quick preview of the fields they entered.
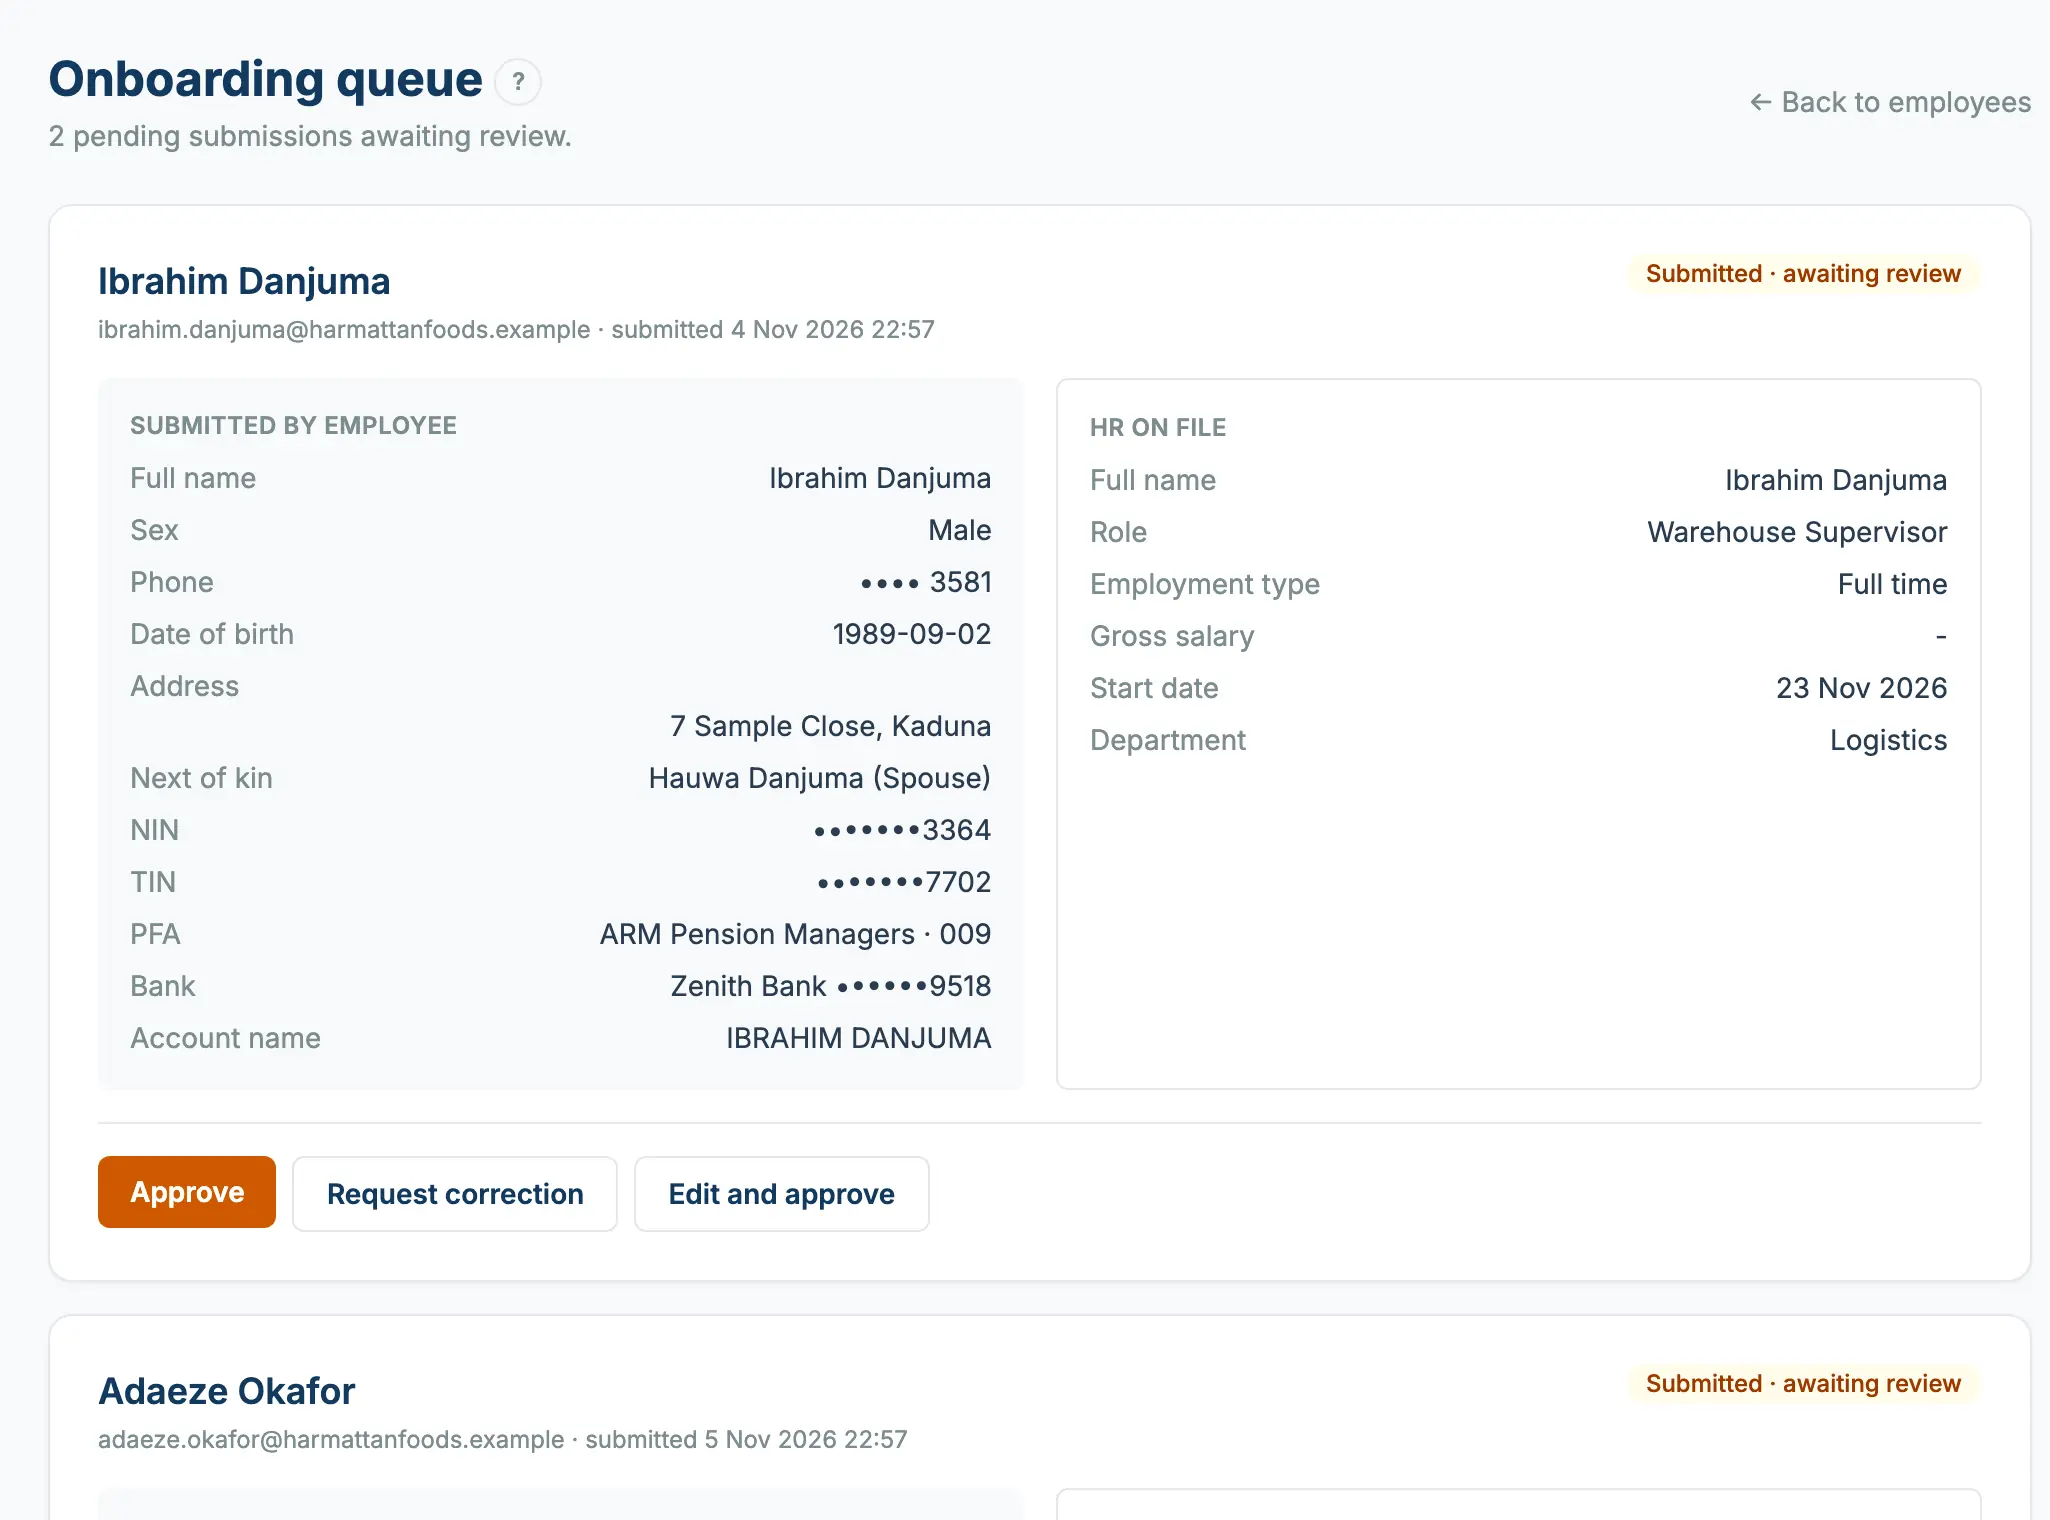
Three actions per submission
- Approve: accept the details as submitted. SpireSlip adds the person to your employee list and emails them a link to set their portal password (the link works for 7 days). Their Portal column shows Invited until they set the password, then Active.
- Request correction, send the employee back to the portal with a note explaining what needs fixing.
- Edit and approve, make a small change yourself, then approve. Useful for typo fixes that don't need to bounce back to the employee.